Daring Bakers Challenges 2009
The September 2009 Daring Bakers’ challenge was hosted by Steph of A Whisk and a Spoon. She chose the French treat, Vols-au-Vent based on the Puff Pastry recipe by Michel Richard from the cookbook Baking With Julia by Dorie Greenspan.
 I have made puff pastry many times and I own Baking with Julia. So, it was fun to have an excuse to try another recipe from the book. FYI: I love the soda bread from the book. It’s incredibly easy – can be thrown together at a moment’s notice. Note that I have seen the spelling of these as vols-au-vent, vol-au-vents, and the singular vol au vent. I’m using vols-au-vent because it is part of the challenge and also because one particular site said that the other spellings are incorrect.
*The recipe in the early part of the book merely describes making the dough. First you mix the dough and then you prepare the butter. I have used the packet method (as depicted in the book) for a while, although many others use the letter fold from start to finish. My friend Marilyn makes the butter into a large square to put inside the dough – which is similar to the description in Greenspan’s book. However, I’ve always just taken the pieces, pounded it with flour between sheets, and then laid them into a square in the center of the cut dough. After trying the square technique, I think I’ll go back to what I usually do. After you lay the butter into the packet and seal it up, then you place the turns (letter folds) into the packet (refrigerating as needed).

dough after cutting 1/3 off
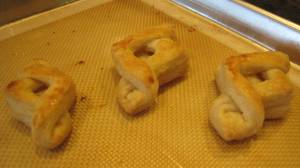
* Steph was very generous in providing the specific information about vol-au-vents beyond the basic recipe for puff from Greenspan’s book. To make a long story short, I decided to make little ones. I also wanted to try the long triangular shape and some small squares. In order to keep the sizes of the squares roughly the same as the circles, I used cookie cutters; thus, the squares were a bit harder because the edges ended up so small and were a bit more difficult to place.
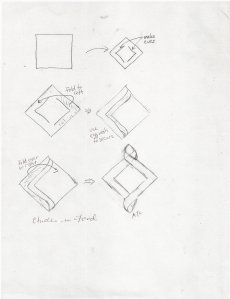 *I also wanted to try the long triangular shape and some small squares. For the triangular shape, one needs to cut a square and then cut the angled part of an arrow on either side. You then fold over one side and then fold over the other side. (See sketch.) This results in a neat diamond on top and the bottom of a diamond shaped opening. You don’t need to cut a separate piece to place on top.
A former instructor for CA students told me that you could keep the vols-au-vent even by putting a sheet pan or a screen on top. Steph’s advice to use a Silpat on top worked perfectly for me and was easy to lift on and off to check doneness. I appreciate learning this easier method.
 *
*
I ended up with even circles and squares. However, because I used one of my cookie cutters for the triangle shape, the centers of the triangular shapes ended up very small. They were good cookies, though.
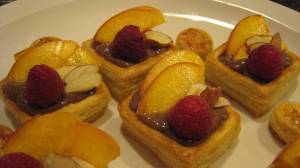
To finish the vols-au-vent, I made some chocolate pastry cream to go into them. Then I simply cut some fresh peaches (Morton’s peaches) and decorated with a little raspberry and toasted almonds.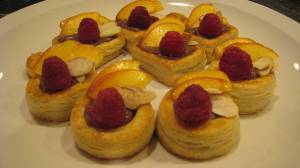
*
*
*
*
*
*
**************
The August 2009 Daring Bakers’ challenge was hosted by Angela of A Spoonful of Sugar and Lorraine of Not Quite Nigella. They chose the spectacular Dobos Torte based on a recipe from Rick Rodgers’ cookbook Kaffeehaus: Exquisite Desserts from the Classic Caffés of Vienna, Budapest, and Prague.
I love making miniature pastries – one of the variations listed in the challenge. The components (cake, buttercream, caramel) were made over a few days. When my sister’s family came over for Sunday dinner, I plated and served the mini dobos tortes for dessert. Everyone loved them. This was fun.

*****Details*****
Cake: In order to make the little cakes, I took out one of my Matfir cutters. I used the wrong side to sketch circles onto parchment. Then I made the cake batter which is like a genoise without the added butter at the end. I made two separate batches (many circles) in order to have some “error” room and to make sure I had enough cake to make at least 7 little cakes. When it came time to cutting the cakes, I turned the cutter to the right side and cut out a smaller circle. (If I were to do this again, I would make the batter in a sheet pan and cut out the circles. I wanted to follow the instructions, though, and there was very little wasted cake.)

Buttercream: This picture doesn’t do the buttercream justice – the texture was fluffy and beautiful, while the taste was divine. It’s made in a similar way to a Swiss but with whole eggs, like a French. I love true buttercreams because they have a rich flavor, rather than a sugary one.

Caramel: OK… Here’s where I had difficulties. I cut many very small pieces of cake. I put them into a mini muffin pan. In spite of this, I could not get the caramel to stay on top of the cake. So, I had disks that had a ring of caramel around the outside. Because I thought the look was just so-so, I went ahead and made a batch of pure caramel disks, using the same recipe but not using any cake. (Note that this caramel recipe uses a lot of water that results in a longer cooking time.)


Hazelnuts: I toasted the hazelnuts and then finely chopped some for the sides of the cakes.
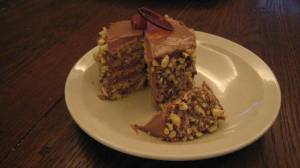
Assembly: After cutting out all the circles, I laid out 8 circles. Then I put buttercream on all of them and layered another 8 circles on top. I repeated this procedure for a total of five layers. To finish the cake, I went back and covered the whole little cake with buttercream and pushed chopped nuts on the side.
For the traditional look: I placed 2 caramelized disks on top of each other and placed one hazelnut next to it.
 *
*
*
*
*
*
*
For a more beautiful look: I placed a hazelnut on top and leaned a pure caramel disk against it.


2 Comments Add your own
Leave a comment
Trackback this post | Subscribe to the comments via RSS Feed
1. First Dobos Torte « Etudes in Food | August 27, 2009 at 12:50 pm
[…] made my first Dobos Torte as part of the monthly Daring Bakers challenge. (If you go to the page, there’s a longer […]
2. Daring Bakers Sept 09 challenge « Etudes in Food | September 27, 2009 at 1:01 pm
[…] summarizing the puffs that I made this month briefly in this blog post, with additional details about the dough here. dough after cutting 1/3 […]